Pages

Showing posts with label parties. Show all posts

Tuesday, 3 September 2013

Daisy-doodle Party


I got to organise a little birthday party for a little girl!  Some people might think I am a little crazy but I do enjoy planning parties, even though I often swear I will never do one again!  I just can't help myself, especially if it's a fresh idea to try!

So for little Migle who turned 3 I planned a yellow and white daisy doodle party.  

Decor was light and fresh with yellow and white streamers, and daisy balloons. ( total of 120 balloon, half of which i blew up myself until my knight in shining armour, compresser in hand, slow motioned towards me....) 

Colouring tables doodled with flowers, bees and butterflies.  For fun we made cardboard bunnies and shaped pipe cleaner flowers.  And went wild with hoolahoops.

Crunchy popcorn, homemade lemonade, daisy lollipops, gooseberry and grape kebabs, quiche, crudites with hummus and tzatziki and carrot cupcakes to nibble.  

I love making someones day extra special!

Thursday, 15 August 2013

Fashion Party Shoot

I recently had the incredible opportunity to moonlight as a decor stylist on a shoot with fashion stylist Nicky van Eck and photographer Romi Stern.  They have both worked on some pretty big brands, both  international and local, so I was super excited and incredibly nervous when they asked me to collaborate with them on this project.

It was a bit surreal at the start of the day when at home (the set), all on my own I baked and iced the cake and cupcakes and I set up.  Feeling as though maybe I gone a little dilly and imagined the whole thing.  

Reality came home when by the afternoon there where kids and mums, make-up and hair stylists, photography equipment and assistants tripping over one another trying to catch the last rays of sun as rain clouds threatened to spoil our fun.

I adore this images, they are so whimsical, captured moments from a fairytale. Well done to out little models who braved the chill and still had a good time!


Sunday, 26 May 2013

Kite Party

My little Liv turned five a couple of weeks ago, and I am proud to share that she asked for a kite party.  Which was a great improvement for the dreaded Barbie pop star party which she originally suggested.  

Every year these birthdays seem to sneak up on me... 

On the promenade just meters from our front gate, there is a circle of mini trees, which I thought would be an ideal spot for our party, with paper bows strung between the branches.  But as fate would have it, raindrops began to fall an hour before the party. And no wind.  Never before have I prayed for a breeze.  

Quick-sticks: set everything up at home.


Catherine Boyd Photography


Catherine Boyd Photography

Catherine Boyd Photography

Catherine Boyd Photography

Catherine Boyd Photography

Catherine Boyd Photography


Catherine Boyd Photography


Catherine Boyd Photography


Catherine Boyd Photography


Catherine Boyd Photography

Martin the marvelous husbands made frames for the kites from meranti dowels. The kids decorated coloured paper which they then glued around the frames.  Added some ribbon tails.  And my prayers were answered with the rustle of leaves and a ray of sunshine.


Packed up the kids and kites up and set off for the promenade to test our creations.
Children ran, kites ascended and soon after plummeted to the ground, narrowly missing children on more than one occasion.. Our breeze was a little wild... Oh what fun! We all then huddled together (there was still a pretty icy nip in the air) and sipped hot chocolate topped with marshmallows.


Happy birthday my angel... I can't help struggling to hold the tears back... 5 is so big, and you make me so proud, bringing brightness to my every day.

Check out dear me, Tash and Noah were there to, and had a few words to say!


Tuesday, 17 July 2012

how to make a piñata

photo by catherine boyd
I thought it might be fun to try make a piñata for Ariana's (Liv's friend) fairy princess party.  I remember the last time I tried paper maché,  I think I was about 10 years old, and I didn't finish it.  Warning: it takes a few days.

Step One
We decided on a heart piñata, and after searching high-and-low for an affordable heart shaped balloon, I had to make another plan: tape together 2 well blown balloon with masking tape.... you might pop a few balloons in the process.
Yes, I chose pink, but you may use any colour you like. And hearts on your washi tape or masking tape, is also optional.


step two
Bundle together a bunch of old newspapers, and start shredding: strips and bits.  Rather tear than snip, as the tearing leaves smoother edges..

step three
Mix 250 ml flour to about 200ml water, with an electric hand held mixer, so that there is less chance of  lumpy flour bits.  I like a thick-runny (does that make sense?) consistency that you can roll on to you paper bit with a teeny roller, or a paint brush, or fingers.  
You can use a thicker or thinner mixture, but just remember that it is the flour that makes it go hard... so the more flour, the better.


step four
Roll some mixture onto your paper bits and paste onto balloons. Cover the entire shape of the balloon and leave to dry overnight.  When it is dry, paste another layer.  I had about 5 layers all together.
Make sure that each layer dries completely.  If there is any wetness, mould will grow.

step five
Sweets?  Before pasting on the last layer, I made a small hole on the top of the piñata, and dropped the sweets in.  Then I pasted paper over the hole.

step six
Paint, glitter, stick.  I pasted on some white tissue paper before I started painting, so that there was no newspaper bits shining through.. you could also just paste a sheet of colour tissue paper on, if you don't feel like painting your piñata.

step seven
Make a hanging thingie.  You will need:  1 - 2m string / ribbon.  5 cm long dowel stick.  Tie the ribbon, very tightly on the middle of the dowel.  You can also glue the ribbon on, so that it is extra secured.  Make a small hole, where you want the piñata to hang from, that the dowel can slide through. Slip the dowel through the hole.  Make sure that the ribbon stays attached.  The dowel will turn vertically when completely in the piñata once you pull the string that it is attached to.  sorry I have no pics of this step, but I hope that make sense.

step eight
HIT, BREAK, MUNCH

send me you pics if you make one! would love to see.. x

photo by catherine boyd

Tuesday, 22 May 2012

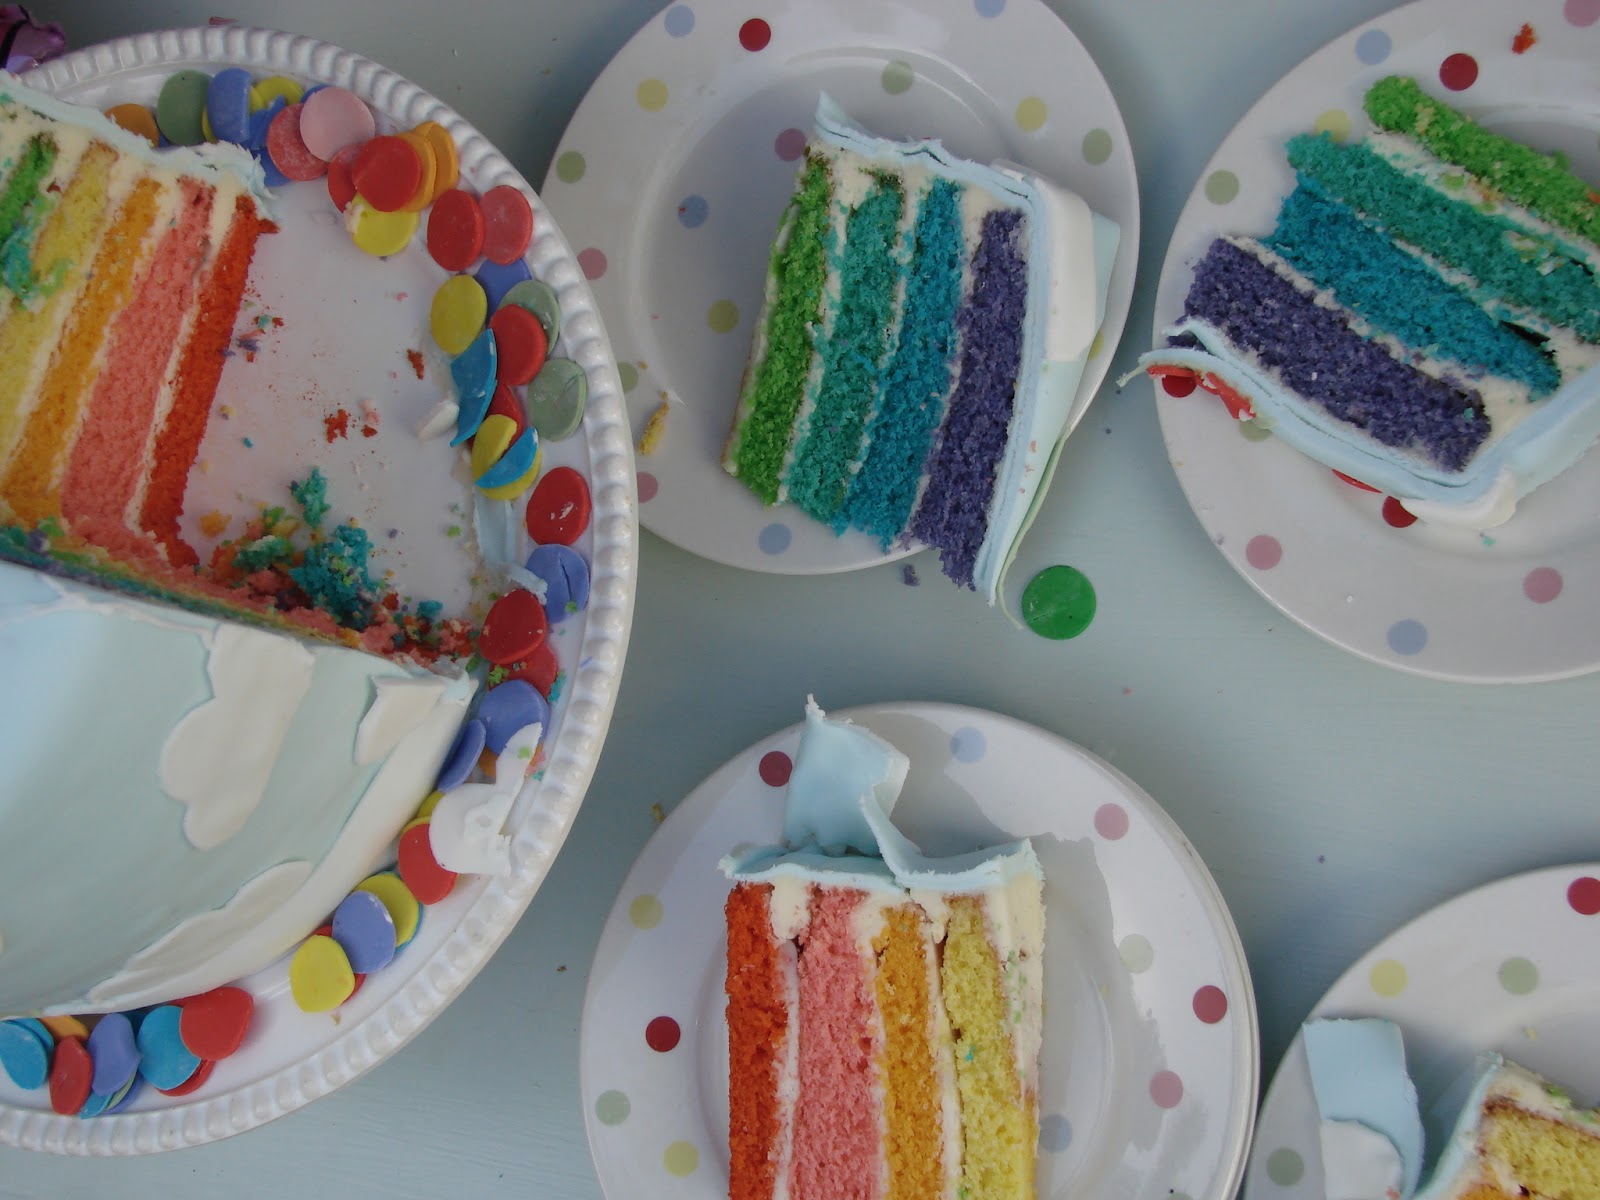
the rainbow party cake


This cake did take some blood (seriously), yoga breathing and a bit of cursing, to complete.  But complete it we did!  This cake is so worth the reaction.  Yes there were literally gasps... Lauren (Lucy's mom) uttered that thank goodness there was champagne, else she would have run home.  I fear that Mariota's (a mom whose kids parties I used to organise way before husbands, children and myprodols) premonition may be coming true:  "One day when you have kids, you are going to be one of those mothers, that other mothers love to hate."  I took it as a compliment at the time, but now I see it as a bit of an omen. Thank goodness I am terrible at a lot of other mommy things: never on time for school, sometimes forget to brush teeth, couldn't find the ballet venue, forget playdates, cereal for dinner... the list goes on..


There were some bumps and bruises, but otherwise we nailed the cake.  I am new to fondant icing... not too mad about the taste, but i wanted a clean finish, and I nearly got it. (This is where the cursing and yoga breathing came into play).   


Otherwise I think this is my most favourite cake that I have ever made.  It was happy & fun.  Livi could help make it, and seeing her smiling with her little fists clenched up in front of her chest in excitement was magical.  

I hope it made up for last years cake.. when I was working 12 hour days and had a 4 month old Sophie.  Pretty much just scribbled her name on a plain sponge and butter icing cake.  I am too embarrassed to even put a pic up.

If you want to make your own rainbow cake, you have to use gel colouring.  A couple of years ago, this was an unimaginable product in South Africa, and I would not have been able to get the colours of the cake even nearly so vibrant, never mind all the shades.  A great tip I also learnt after researching some rainbow cakes came from One Charming Party.  They suggested that you clingwrap each layer of cake seperately and then freeze them.  This makes stacking the layers incredibly easy, and as you can see even liv could do it.


also check out rainbow party:


Related Posts Plugin for WordPress, Blogger...